01 09 10

Tuesday, 25 July 2017

We've Got an Allotment Shed!

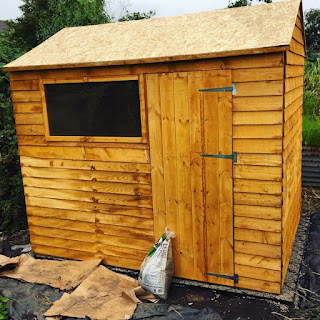
It's not finished, but it's standing and it's got a roof so we've at least got somewhere to leave our tools now!

Building a shed on an allotment
Allotment shed joy

Needless to say, we knew nothing about building a shed on an allotment, so I did a bit of research about where to start, and about what kind of base would be most practical. I ordered a plastic base off Amazon, and we filled it with 12 large bags of 10mm gravel from B and Q. I'll be adding a blog post with more details shortly as this was a very easy and convenient method which I'd completely recommend!

We knew roughly where we wanted to locate the shed and had spent a couple of days clearing brambles from the relevant area. We didn't bank on torrential rain for the several days leading up to the delivery though, or being caught in a massive thunderstorm partway through laying out the base! We got pretty muddy, quite scratched and very, very tired, but we managed to lay the base for the allotment 22 shed on Saturday, then started the actual construction on Sunday.

We spent around 8 hours at the plot on Saturday (including 30 minutes sheltering in the car after realising hiding under a lofty cherry tree in a massive thunderstorm probably wasn't the best idea), and about the same again on Sunday.

When the heavens open when you're JUST about to
finish laying the shed base after 8 hours...

This week's jobs - weather permitting - are to felt the roof, add the trim, screw the shed onto its base, and to give the whole thing a coat or two of paint. Then all that will remain is to add some shed storage and creature comforts...


Monday, 17 July 2017

Tackling the Brambles: Part Two

We've been pretty busy lately and haven't had as much time at the allotment as we would have liked. The arduous task of removing brambles had been left for the last couple of weeks as we've only really been down to collect redcurrants and check on the fruit bushes. Yesterday, however, we had a good 5 hours down there and made considerable progress with clearing the space where our shed's going to go.


After Googling how to get rid of brambles and reading up on other people's experiences, we just opted for the simple method of cutting them back manually then digging the roots out. We don't have strimmer so just cut them back with secateurs then dug into the ground with a fork to loosen the soil until we could start pulling the roots out. God, those bramble roots spread far! It was an eyeopener to follow them along under the surface and see just how far they went.

We've now cut back as far as we plan to so once we've removed the rest of the bramble roots, it will (hopefully) just be a case of keeping the brambles cut back to the area they currently occupy and taking care not to let them start taking over the bottom third of the plot again. If we were planning on removing ALL the brambles, I think we'd have to give in and borrow a strimmer from someone, and we'd likely need a lofty stepladder too as the brambles are so high. We're going to leave the brambles right at the end of the plot though as that patch doesn't get a great deal of sun and there are lots of frogs living down there. I like the idea of leaving one little part of the plot as natural as possible and I love blackberries so am happy to leave one section of brambles!

We had originally decided to leave the bulk of the brambles until after we'd collected all the blackberries in a couple of months' time, but yesterday, we just got on a roll and kept hacking and hacking! The section we removed was absolutely swamped in bindweed, and there was also a lot of dead wood mixed in with the brambles. We must have cleared about 15 square metres of brambles and bindweed. We need to go back this week and finish digging up the roots but we got some seriously heavy duty roots out yesterday - so satisfying! Equally satisfying is removing bindweed - metres and metres of it - in one movement! That stuff is relentless yet weirdly satisfying to pull off other plants and bushes. Of course, the omnipresent mare's tail was also shooting up alongside/inside/all around the brambles so we pulled up a lot more of that too, some of it 5 or 6 feet tall. I hate that stuff!

Overgrown allotment with brambles, bindweed and mare's tail
Before...

Clearing brambles from allotment
After...

Before the sunburn :-(


I also got a bit sunburnt, which I'm really annoyed about as I'm usually so careful. It was blazing sunshine later in the day but distinctly overcast for half the time we were there and it just slipped my mind to SPF up. I'm starting to understand why all the allotment holders have such a healthy glow all year round.

We're hoping to get down to the plot a few evenings this week - weather permitting - and get rid of the rest of the bramble roots, as well as level out the ground ready for the shed base.

All being well, we're aiming to get our shed delivered on Saturday and spend the weekend constructing it. So exciting to think we won't have to cart our tools back and forth every time any more! It will make it so much easier to pop down to the allotment; plus the car will no longer need valeting every 5 minutes. I think having the shed will make the plot finally really feel like "ours" and I can't wait to turn it into a little haven where we can sit and have a break from all the hard work and get out of the sun/rain as needed.

Thursday, 13 July 2017

Redcurrant Gin Recipe

Easy redcurrant gin recipe


I love gin. It's the only spirit I actually drink, and I love how versatile it is. My favourite way to drink it at the moment is with elderflower tonic (which I've only just discovered!), a few slices of cucumber and a couple of fresh mint leaves. Hopefully I'll be growing cucumber and mint on the allotment by next year, and I'd quite like an elderberry bush eventually too, but for the moment, all we've got is lots of berries in various stages of ripeness and attractiveness.

I'm holding out a lot of hope that our bumper blackberry crop will be a successgiven how much of our plot is taken over by brambles, we're going to be swamped for the next 6 monthsbut until then, it's all about the redcurrants, blackcurrants and gooseberries. 

I was browsing Pinterest the other day, trying to find recipes that use redcurrants. I had no idea what to use them in. I soon came across this recipe for redcurrant gin, however. I say recipe, but it's barely even thatit's basically just gin, redcurrants and sugar, and the method couldn't be simpler. I've seen other recipes that add lemon zest, so I decided to split my mixture in half and try half with zest, half without.


Homemade redcurrant gin in a Kilner jar


I'm not sure what to expect from this, and I've got no idea what mixer to serve it with. I saw someone on a forum suggesting ginger beer and I quite like the sound of this, so might try it out when the gin is ready in a couple of months! I used this Kilner Square Clip Top Jar 0.5 Litre from Amazon. I know there are lots of preserving jars out there, but I always use Kilner as I love the look and feel of them, and they always seem so solidly made! I've got these jars in a variety of sizes, and I used two 0.5 litre ones for this gin. I added lemon zest to one and not the other so I can compare the two once they're ready and see which I prefer.

Redcurrant Gin Recipe

Ingredients

300g redcurrants
150g caster sugar
750ml gin
zest of one lemon (optional)

Method

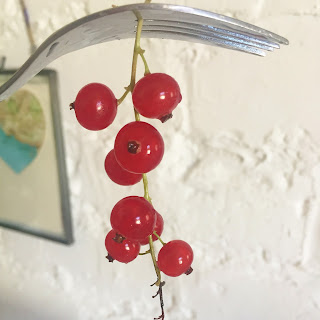
1. Remove the redcurrants from their stalks by holding the top of the bunch firmly in one hand and running a fork lightly down the strig. Wash thoroughly.

2. Crush the redcurrants with the caster sugar, and lemon zest if using (I used a fork to lightly crush the berries), in a bowl. 

3. Transfer to a Kilner or similar airtight jar, add the gin, and seal the jar. 

4. Place the jar in a cool, dark place, and shake it once a day for one month, then just occasionally for another month.

5. After the two months are up, strain the gin through a sieve of muslin cloth and decant into a bottle. 

I'll let you know the results in approximately two months!

How to remove redcurrants from their stalks

Redcurrants in a bowl

Redcurrant gin in a Kilner jar

Follow my blog with Bloglovin

Monday, 10 July 2017

Redcurrant overload

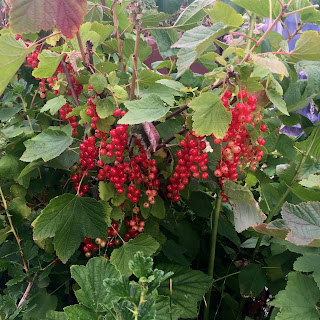
So, although our neighbour has now collected all the huge, juicy redcurrants from his plot, ours haven't ripened quite as quickly as his. We've collected some of the best ones - to be used for redcurrant gin very shortly! - but there are still a lot that aren't fully ripe. 

The bushes are heavily laden and very, very dense, but as our plot has been neglected for so long, they presumably haven't been pruned in a while. After watching this short but helpful Gardeners' World clip of Monty Don  pruning redcurrants I can see what needs doing before next summer.

For this year, however, we'll hopefully get some decent redcurrants, although it seems there's just far too much fruit on the bushes for them to get as large and juicy as they should be.

Redcurrants on an overgrown and neglected bush
Neglected redcurrant bush

Redcurrants ripening on an overgrown bush
Ripening redcurrants - pretty inconsistent in places!

Friday, 7 July 2017

Weed Suppressant

As our plot was so overgrown when we took it on, we decided to start by clearing the worst of the weeds and then laying down some kind of weed suppressant. We researched a few different options and spoke to other plotholders and friends who were experienced gardeners. While a lot of people seemed to favour old carpet in the past, this wasn't an option as the use of carpet is banned on our allotment. The reason for this is that chemicals can seep into the soil. We didn't have ready access to carpet anyway, so this wasn't too much os a disappointment! Cardboard was another option, and we still intend to lay down some very heavy cardboard in some parts of our plot, possibly the more heavily overgrown sections that we won't get to just yet.

We also considered black plastic sheeting. There was already some of this on our plot, albeit very ripped and cracked. While this is a popular option as it keeps light AND water off the ground, thereby killing weeds more quickly, we were put off by the fact that the ground would be very dry and hard to work. We always planned to uncover small sections of ground at a time, and map out and dig over our beds one by one.

As the vast majority of the central part of our plot was taken over by mare's tail, which we'd be breaking off at the ground, and various grasses, we opted for weed membrane, which we hoped would be able to cope with finishing off the grass while preventing the mare's tail from popping up again. We read lots of reviews online and checked out forums to find which one would suit our needs. We knew we'd be traipsing back and forth over it, and that it needed to be heavy duty. We also wanted something that would let water in but was thick enough to effectively block light.

We checked out a few fabrics in shops, but lots of them seemed pretty flimsy and let a lot of light through.

 Eventually, we decided on this Yuzet Heavy Duty Weed Control Fabric from Amazon. It gets great reviews, and seemed reasonably priced for a heavy duty weed membrane. It also came in 50m rolls, which was great as we knew we'd need a lot! While it's only really been a couple of months since we laid the first of our weed control fabric, we're really impressed so far. It's withstood all kinds of weather so far, and has remained firmly in place. There are absolutely no signs of wear and tear yet, except at the odd edge where we've snagged it while cutting, or have had to pull pegs out to move them.

Weed control fabric on Allotment 22


As you can see from the photo, it's got a bit of a sheen to it, and is a little more plasticky than lots of fabrics. I was concerned it might tear easily because of the texture, but this honestly hasn't been a problem. The guidelines down the length of the fabric will be helpful when we come to lay paths in future and the fabric is really easy to cut with regular scissors.

We started off holding it down with bricks, but this wasn't ideal as they're easy to trip over and kick out of position. We got these Yuzet 6" Weed Control Fabric Pegs, also from Amazon, and they've been great to use. We push them in as far as we can with our hands, then stand on them firmly to push them right into the ground. It's a lot easier when it's rained recently, that's for sure! The only problems we've had are when the pegs have hit stone or pebbles - all too common on our plot, sadly - and we have to pull them out to re-position them. When you do this, the hooks on the pegs can catch on the weed control fabric and fray it a little but it's not too much of an inconvenience.

All in all, we're impressed with this product so far and will certainly be buying it again when we run out of our current supplies.
Thursday, 6 July 2017

Strawberry Cupcakes

I've been making these cupcakes for years and they're perfect for summer - light, fluffy, fruity and colourful. The cake is a simple vanilla sponge, while the buttercream is flavoured with fresh strawberries. The beautiful strawberries used were donated by a more established plot holder (obviously he gets some cakes as a thank you), but I can't wait to be picking my own strawberries from Allotment 22 next summer!


Recipe (makes 12)

Cupcakes

250g caster sugar
250g self-raising flour
250g butter (at room temperature)
2 medium free range eggs
2 tbsp milk
1 tsp vanilla extract
Pinch of salt

Straweberry buttercream

150g butter
375g icing sugar
150g strawberries 
Extra strawberries to garnish

1. Pre-heat oven to 190°C/Gas Mark 5. 

2. Beat the butter in a large mixing bowl until smooth. Add the sugar, flour, eggs, milk, vanilla and pinch of salt and whisk until the mixture is well combined and smooth. 
3. Place the cake cases into a muffin tin and divide the mixture evenly between the cases.
4. Bake for approximately 20 minutes, or until cakes are a light golden brown colour.  Remove cakes from the tin and transfer to a wire rack to cool.

For the frosting:

1. Puree the strawberries. If you want a smooth buttercream, push the pureed strawberries through a sieve to remove the seeds.
2. Beat the butter in a large bowl until soft and smooth. Add the puree, then incorporate the icing sugar gradually, beating until you have reached the desired consistency.
3. Pipe or spread your buttercream onto the cakes, finishing each one with a fresh strawberry.

These cakes are best kept in the fridge until shortly before serving.

Wednesday, 5 July 2017

Planning Our Shed

As previously mentioned, our plot has nothing in the way of structures. We keep chatting to other plotholders who were fortunate enough to have a shed, greenhouse or BOTH on their plots when they took them on, while all we've got is 200 square metres of mare's tail and a smashed up greenhouse. C'est la vie. Anyway, we are getting really sick of transporting our tools and supplies to and from the allotment every time we go so are desperate to get a shed. We've decided on an 8x6 shed with double doors and have a shortlist of a few we like the look of. 

While I know the appearance of the shed doesn't really matter, and I love the rustic, cobbled together sheds you see on so many plots, I've been looking at some of the ways people have dressed their sheds and I love the idea of having a little haven, and not just somewhere to store tools. I've been stalking Pinterest, putting together a board of sheds and would love to eventually end up with something like one of these. Might be a while off though as there are obviously more pressing jobs at the moment than painting and putting up bunting.


Now all that's left to do is clear a space for the shed, level off the ground, get some weed control fabric and a base down, and order the actual shed. We've decided we want it near the far end of the plot, but not right at the end as we'll be keeping some of the very productive brambles that grow against the fence, and we've also decided our compost bins will go down there too in the shadiest, dampest part of the plot. Also, our leafmould bin, although I've only just heard about these (because, novice). The shed will be next to our apple and pear trees, and our soon-to-be-laid path will lead right to it. Here's Glyn measuring the spot where we're planning on placing the shed and looking way too happy for someone with this much work to do:


As you can see, there's a lot of mare's tail and bindweed to be removed (not too bad) but also a ton of brambles (grrrrr). Our aim is to get the shed area cleared this week and get some of our heavy duty weed membrane down as soon as we've levelled off the ground. The area just in front of that in the above picture is the only place we've done any serious digging so far, when we were removing brambles last week. God, those roots go deep! While we were digging up the brambles, we found several very heavy metal poles and lots of broken gardening tools, glass, bricks, stones and other bits of rock-hard debris that made an already arduous task far harder! We're really hoping the spot we've picked for the shed won't be as bad but I'm starting to wonder if the whole plot is going to be like that...

Wish us luck!


Tuesday, 4 July 2017

The Dreaded Mare's Tail

I'd never heard of mare's tail - or marestail, or horsetail, or Equisetum arvense to give it is proper name - before we took on our allotment. When we first viewed allotment 22, most of the weeds and grass had very recently been cut back by the council. Although the council have a policy to not get involved in the upkeep on allotments these days due to a lack of funds, apparently our plot was so bad that they made an exception.

When we viewed our plot, it was neglected and overgrown, but I didn't notice any mare's tail. When we returned two weeks later, it was full of those strange cone-like stems. We had no idea what they were, but a friendly fellow plot holder told us. After plenty of online research, we established mare's tail is almost impossible to remove, but that it is possible to weaken it dramatically.

This was taken before the mare's tail actually got too bad :-/

Most of the online resources I've used state that the fir tree-like mare's tail plants can reach "up to 2 feet in height". All I can say is, I wish ours was only 2 feet tall! In certain spots - usually in and around bushes and brambles - ours regularly reaches heights of 5-6 feet. Yep, it's as tall as we are. In fact, it's a lot taller than us in places but we haven't got round to tackling the more towering stems yet!

How to remove mare's tail


The one good thing about mare's tail is that it's easy to remove the shoots and fertile fir tree plants by snapping them off at the ground. We must have filled about 10 huge cement sacks (the kind you could fit a small car in) in just a couple of weeks by doing this, and there is still a lot more to go. I think we've been to the council tip more times in the last few weeks than we have in our entire lives. It's very satisfying to get rid of them, though, even though I know they'll return!

My mum and niece working on the mare's tail

Our hope is that once our plot is cultivated, we can try and stay on top of the mare's tail as much as possible, removing shoots as soon as they appear. Considering our plot has been neglected for so long, and due to the time of year we took it on, it's safe to say we shouldn't experience anything like the same level of problem with mare's tail again.

Although there is a fair bit of mare's tail on the rest of the site, it's nowhere near as bad as on our plot. Our neighbours have the odd stem sprouting up among their crops, but the majority of sites don't have any signs of it. 

Resources


If you're determined to eliminate mare's tail, horse tail, Equisetum arvense, call it what you will, this site has some great tips and case studies. We're sticking to the snapping-off-and-hopefully-weakening technique for now though!


Monday, 3 July 2017

Tackling the Brambles: Part One

...part one of several hundred, sadly. Probably. While we haven't attempted to measure how much of the far end of our allotment is taken over by towering brambles, it's possibly around 20 square metres, and they reach heights of well over 8 feet.

As well as the monstrous brambles at the end of our plot, there are several smaller bushes scatter along the perimeter fence down one side. It was these brambles we tackled at the weekend,  digging up the roots of two very well-established bushes. We'd cut the brambles back during the previous week so all we had to do this time was dig up the roots. I say "all we had to do", but this was far harder than anticipated!


We also found lots more glass, an assortment of very old, very rusty old garden tools, a manky soil sieve and a few broken plates, pieces of old metal signs, lots of bricks and a metal pole inserted so solidly and deeply into the ground that we initially thought it had been cemented in. It was exhausting, and we probably only managed to clear about 2 square meters of ground in the end. It's satisfying to know we've got rid of two very stubborn bramble bushes and a great deal of rubbish though!


We're planning on laying a path down both edges of our plot this summer, and hope to order our shed in the next couple of weeks, so this is what we're working towards at the moment. We've selected a spot for our shed and are planning to have a small seating area next to the shed and apple and pear tree.


We've currently got around 54 square metres currently covered with heavy duty weed membrane, We've been using Yuzet Heavy Duty Weed Control Fabric from Amazon and we're pretty impressed so far! It's managed to withstand lots of very strong winds (several other plotholders' greenhouses unfortunately didn't) and seems to be doing the job. We've held it down with a combination of bricks - as you can see in the picture - and pegs. I'd definitely recommend using pegs if you can as they look neater, you're less likely to trip over them, and they hold the weed membrane firmly in place. So, while the weed suppressant does its job and (hopefully) kills off the remaining weeds underneath, we're concentrating on our first path and our shed. And also collecting a few berries!

Discovering our Pear Tree


When we first viewed our plot, the fruit trees were in full blossom. The largest tree we knew was a cherry tree, likewise the smaller tree next to it. I recognised one of the other trees as being an apple tree, but had no idea about the others. We recently learned that we have a pear tree - great news for me as I absolutely love pears! It didn't seem to be in great condition, however, so I took a closer look to see what state it was in.

When I say I'm a complete beginner to allotmenteering/gardening, it's not an exaggeration! Apart from a few containers in our small yard at home, and a few houseplants that have managed to survive beyond a couple of weeks, I've never done any growing or cultivation.

The first thing I noticed was that some of the leaves of the pear tree had red spots on them. These had occurred in clusters of leaves, with large sections of the tree unaffected. A quick Google search revealed this was pear leaf blister mite, which, obviously, I'd never heard of. I learnt that you can simply remove the affected leaves if the infestation isn't too severe, but that you should leave them alone if the entire tree is covered as removing that many leaves is likely to cause severe damage to the tree. As it wasn't particularly widespread, we simply began to remove the affected clusters of leaves.
IMG_4769

While it doesn't look very appealing, pear blister mite does not affect the fruit, so it's still safe to eat. The Royal Horticultural Society has more in-depth information on the pear blister mite here.

The next thing I discovered was pear scab. This was only present on a couple of pears, and again, isn't serious. I honestly had no idea of all the crop-specific conditions and diseases that were out there, but luckily everything I've come across so far has been non-serious and easy to deal with! While pear (and apple) scab is serious in commercial crops as it means the fruit can't be sold, it apparently barely affects the quality of the fruit at all so the fruit can still be used. I'm not sure how tempting I would find scabby fruit, even knowing it was safe, but it doesn't seem to be very widespread at all so fingers crossed it stays that way!

IMG_4770

The RHS (again - what would I do without their site and books?) recommends pruning young shoots that have been affected, and clearing away fallen leaves and affected fruit to try and limit the amount of fungus still around to cause scabbing next season.

Next job is to closely inspect the apple tree and see what kind of state that's in!

No. 22: Positives so far!

While it's easy to be disheartened by the amount of work we've got to do, we have come across some positives so far!

Cherry tree


We've been told by other plotholders that our cherry tree is way too big and should have been kept to a height of around 10 feet ideally. I've no idea how tall it currently is...20 feet maybe? It's hard to tell. When we first viewed the plot it was in full blossom and looked so pretty that it definitely helped sell the plot to us. It went on to drop a lot of cherries before they were ripe and it hasn't been possible to cover it this year to protect the cherries from birds as it's so huge so I'm not sure we'll get much from it this season. We plan to cut it back considerably when we can and give it a little TLC.

cherry tree in full blossom (April)

Redcurrants, raspberries and gooseberries


When we viewed the plot, we were told we had a few raspberry bushes at the entrance. Turns out it's not just raspberries.

redcurrants starting to ripen (June)

The bushes were/are absolutely swamped by weeds and mare's tail (of course!) but we're working on clearing them. There was an awful lot of bindweed strangling the fruit bushes but we've made good progress with this. We've got a few decent berries from the bushes, and the goosberries have probably fared best of all this year. Perhaps they're simply more able to stand up to neglect and pests than redcurrants and raspberries? Hopefully by next summer we will manage to get a decent harvest from this part of the allotment!

Apple and pear trees


We originally thought we had two apple trees, but it soon transpired one was in fact a pear tree. Neither tree looked in particularly great condition. and we soon discovered the pear tree had pear leaf blister mite. This turned out to be fairly easily dealt with, despite it not looking very attractive. We're looking forward to seeing how the apples and pears turn out this summer!

apples growing (June)

Brambles


Of course, we also have lots and lots of brambles, reaching around 8 feet high in some places. Possibly a lot more than 8 feet - it's hard to tell! We're going to collect as many blackberries as possible once they're ripe, and then plan to drastically cut back the brambles in the winter. We will probably keep a small area of brambles as they're predominantly right at the back of our plot in a shaded area next to a fence and trees. We're planning to place our compost bin next to that area, and want to leave a small part of our plot relatively untouched for wildlife. We have a lot of frogs on our plot and they seem to be concentrated around that damp, shaded area. Also - blackberries. Who doesn't love blackberry and apple crumble?


Roping the Family in!


IMG_4556
The family getting stuck in

Last Saturday was a mild day with broken sunshine, a gentle breeze and no more than a light shower forecast - in other words, great allotment weather! I bribed my family with a picnic to come and join us down on the allotment, expecting maybe a little light weeding from them for an hour or so, and nothing more. They arrived about 1pm, however, and stayed until gone 6:30pm!

The age range of our family helpers stretched from 8 years to 77, and everyone got stuck in. The mare's tail is by now in that fir-tree like appearance phase and is so invasive and such an eyesore, yet so easy to pull up, that I think everyone was determined to get rid of as much as possible!

My little niece was delighted to find countless frogs, and she was tasked with moving them out of harm's way to the far end of the allotment where it's very damp and dark. Approximately 20 square metres of the bottom of the plot is filled with towering brambles so I think it'll be a while before we get to work on that!

As there was a team of people dealing with the mare's tail and the overhanging brambles from a neighbouring plot, we decided to make a start on clearing the broken glass from the greenhouse area.
The remains of the greenhouse
The remains of the greenhouse :-(

Mare's tail for days
Mare's tail for days...

I've no idea what happened to the greenhouse but I suspect it was been completely smashed by vandals at some point as we didn't find a single sheet of intact glass. It's disappointing not to have a greenhouse or shed but I guess if the plot was better equipped, someone else would have snapped it up and we'd still be on the waiting list!

We still haven't decided what to do about the greenhouse - the site secretary told us originally that it would still be fine to use if we got hold of some replacement glass but after taking a closer look at it, a lot of the metal frame components are very bent out of shape. We managed to clear a lot of the glass and rubbish from the greenhouse area, but there's still a long way to go!


First Look at Our Allotment

Saturday 15th April, 2017. I had a terrible cold and a slight hangover (the results of two consecutive nights out - it was Easter weekend) when the phone rang. It was the site secretary from an allotment I'd never even heard of.

Well, one I'd forgotten I'd ever heard of. I'd put my name down on the waiting list, so I must have seen the name of the site at least once. They had an allotment up for grabs, and did I want it? In my excitement, I agreed to meet the secretary at the site in a couple of hours. It was only after I hung up that I realised I had no idea where the allotments were.

After Google-mapping the allotments and discovering they were about a 10-minute drive from our house, we set off to view our plot. I'd never been on an allotment before so had no idea what to expect. If pressed, however, I probably would have told you I'd expect to find a slightly overgrown plot with a rickety shed and possibly a little greenhouse.

What we found instead was a scruffy wasteland with a smashed greenhouse at one end, lots and lots of rotting wood, and absolutely no signs a shed had ever stood there. It did have a cherry tree, which was in full blossom, and several other trees we couldn't identify.

Our cherry tree in full blossom


Not gonna lie - the cherry tree was a big selling point!

Needless to say, we took the site, and were handed the keys to the gate. It all seemed so quick and easy!

Of course, this was before we discovered the dreaded mare's tail...

(Almost) spring on the allotment

I'd be enjoying this run of warm, sunny weather much more if it was, say, early May than February, but it's certainly been nice to g...