01 09 10
Showing posts with label berries. Show all posts

Tuesday, 5 June 2018

A lengthy hiatus and a lot of progress

We're well and truly back and getting stuck into the allotment after a lengthy break. Due to serious illness in the family, work commitments and a particularly stressful few months, we didn't get down to the allotment for several months over autumn and winter. We're trying to make up for it now, however, and have been pretty productive over the last couple of months.

Of course, the ******* mare's tail/horse tail/whatever you prefer to call it has been super active once more and it's been really disheartening to see it taking over the plot again after all our hard work of last year! We understand we just won't be able to eradicate it though so are just doing our best to keep it under control. Even the most pristine plots on our site - those with dedicated and retired tenants who spend hours on-site every day of the week - still have the odd mare's tail scattered around the crops so we've accepted we just need to get on with it. I still hate it though!

We have strawberries this year, although our biggest and best strawberry was eaten by a bird this week before we had a chance to net the plants. The nets are in situ now, however, and the rest of the plants look good. 

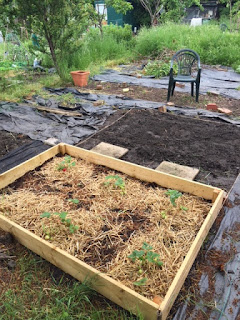
We've dug over three beds so far, and have built wooden edging for the first one.


We decided against proper raised beds as we were concerned they'd have a tendency to dry out and with us both working full-time, it's not always possible for us to get to the plot as much as we'd like. Our beds are ever so slightly raised, but that's just the result of the extra material we've mixed in with the existing earth - rotted manure and compost to try and improve the soil. We chose to edge the beds with wood as it gives us the flexibility to raise the beds in future if we want to and also keeps everything neat. We are planning on using free woodchip for our paths so the wooden edging will act as a barrier to keep things in place. 


We've also got a lovely bed of tomato plants on the go. A kind allotment neighbour gave us a tray of Gardener's Delight plants and we planted them out at the weekend after hardening them off outside. Unfortunately, the hardening-off period coincided with the weekend we were away in London and it was scorching hot for several days, so the poor plants looked a little worse for wear. A bit of TLC seems to have perked them up though and they're looking much better now. Neither of us has ever grown tomatoes before so we're looking forward to learning as we go and hopefully having a glut of delicious cherry toms later this summer.

Plans for this weekend include sowing some curly kale (I LOVE kale and have heard it's hardy and easy to grow so fingers crossed!) and finally starting work on a seating area so we've got somewhere comfortable sit on those long days down on the plot :-)

Finally, it's not our plot (obviously) but I am in constant awe of this super-neat and well-maintained plot behind ours...

Thursday, 13 July 2017

Redcurrant Gin Recipe

Easy redcurrant gin recipe


I love gin. It's the only spirit I actually drink, and I love how versatile it is. My favourite way to drink it at the moment is with elderflower tonic (which I've only just discovered!), a few slices of cucumber and a couple of fresh mint leaves. Hopefully I'll be growing cucumber and mint on the allotment by next year, and I'd quite like an elderberry bush eventually too, but for the moment, all we've got is lots of berries in various stages of ripeness and attractiveness.

I'm holding out a lot of hope that our bumper blackberry crop will be a successgiven how much of our plot is taken over by brambles, we're going to be swamped for the next 6 monthsbut until then, it's all about the redcurrants, blackcurrants and gooseberries. 

I was browsing Pinterest the other day, trying to find recipes that use redcurrants. I had no idea what to use them in. I soon came across this recipe for redcurrant gin, however. I say recipe, but it's barely even thatit's basically just gin, redcurrants and sugar, and the method couldn't be simpler. I've seen other recipes that add lemon zest, so I decided to split my mixture in half and try half with zest, half without.


Homemade redcurrant gin in a Kilner jar


I'm not sure what to expect from this, and I've got no idea what mixer to serve it with. I saw someone on a forum suggesting ginger beer and I quite like the sound of this, so might try it out when the gin is ready in a couple of months! I used this Kilner Square Clip Top Jar 0.5 Litre from Amazon. I know there are lots of preserving jars out there, but I always use Kilner as I love the look and feel of them, and they always seem so solidly made! I've got these jars in a variety of sizes, and I used two 0.5 litre ones for this gin. I added lemon zest to one and not the other so I can compare the two once they're ready and see which I prefer.

Redcurrant Gin Recipe

Ingredients

300g redcurrants
150g caster sugar
750ml gin
zest of one lemon (optional)

Method

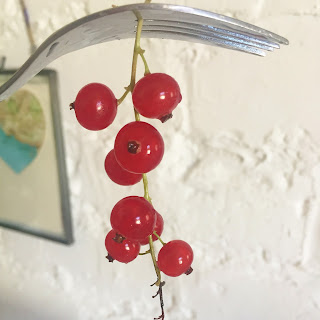
1. Remove the redcurrants from their stalks by holding the top of the bunch firmly in one hand and running a fork lightly down the strig. Wash thoroughly.

2. Crush the redcurrants with the caster sugar, and lemon zest if using (I used a fork to lightly crush the berries), in a bowl. 

3. Transfer to a Kilner or similar airtight jar, add the gin, and seal the jar. 

4. Place the jar in a cool, dark place, and shake it once a day for one month, then just occasionally for another month.

5. After the two months are up, strain the gin through a sieve of muslin cloth and decant into a bottle. 

I'll let you know the results in approximately two months!

How to remove redcurrants from their stalks

Redcurrants in a bowl

Redcurrant gin in a Kilner jar

Follow my blog with Bloglovin

Monday, 10 July 2017

Redcurrant overload

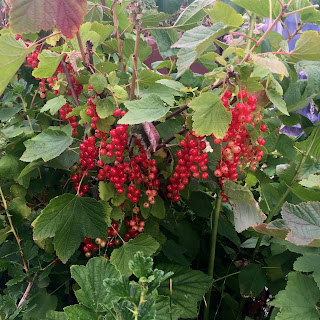
So, although our neighbour has now collected all the huge, juicy redcurrants from his plot, ours haven't ripened quite as quickly as his. We've collected some of the best ones - to be used for redcurrant gin very shortly! - but there are still a lot that aren't fully ripe. 

The bushes are heavily laden and very, very dense, but as our plot has been neglected for so long, they presumably haven't been pruned in a while. After watching this short but helpful Gardeners' World clip of Monty Don  pruning redcurrants I can see what needs doing before next summer.

For this year, however, we'll hopefully get some decent redcurrants, although it seems there's just far too much fruit on the bushes for them to get as large and juicy as they should be.

Redcurrants on an overgrown and neglected bush
Neglected redcurrant bush

Redcurrants ripening on an overgrown bush
Ripening redcurrants - pretty inconsistent in places!

Thursday, 6 July 2017

Strawberry Cupcakes

I've been making these cupcakes for years and they're perfect for summer - light, fluffy, fruity and colourful. The cake is a simple vanilla sponge, while the buttercream is flavoured with fresh strawberries. The beautiful strawberries used were donated by a more established plot holder (obviously he gets some cakes as a thank you), but I can't wait to be picking my own strawberries from Allotment 22 next summer!


Recipe (makes 12)

Cupcakes

250g caster sugar
250g self-raising flour
250g butter (at room temperature)
2 medium free range eggs
2 tbsp milk
1 tsp vanilla extract
Pinch of salt

Straweberry buttercream

150g butter
375g icing sugar
150g strawberries 
Extra strawberries to garnish

1. Pre-heat oven to 190°C/Gas Mark 5. 

2. Beat the butter in a large mixing bowl until smooth. Add the sugar, flour, eggs, milk, vanilla and pinch of salt and whisk until the mixture is well combined and smooth. 
3. Place the cake cases into a muffin tin and divide the mixture evenly between the cases.
4. Bake for approximately 20 minutes, or until cakes are a light golden brown colour.  Remove cakes from the tin and transfer to a wire rack to cool.

For the frosting:

1. Puree the strawberries. If you want a smooth buttercream, push the pureed strawberries through a sieve to remove the seeds.
2. Beat the butter in a large bowl until soft and smooth. Add the puree, then incorporate the icing sugar gradually, beating until you have reached the desired consistency.
3. Pipe or spread your buttercream onto the cakes, finishing each one with a fresh strawberry.

These cakes are best kept in the fridge until shortly before serving.

(Almost) spring on the allotment

I'd be enjoying this run of warm, sunny weather much more if it was, say, early May than February, but it's certainly been nice to g...